4/16/19 - Introductions to Physics (Video Tutorial from Unity Website). Each of these videos introduces you to three important concepts in physics with your video games: colliders, triggers, and rigidbodies.
4/9/18 - Create a Rolling Ball Game with Force and Gravity in C# (Video Tutorial by Daniel Wood). Directions (with the Sub): Reopen "TerrainPractice". Make sure you have an open/flat area in this scene to create your rolling ball (you don't want all hills where the ball won't be able to move. Watch the video and practice along as you learn these new concepts.
Directions for 3/15 with Substitute Teacher
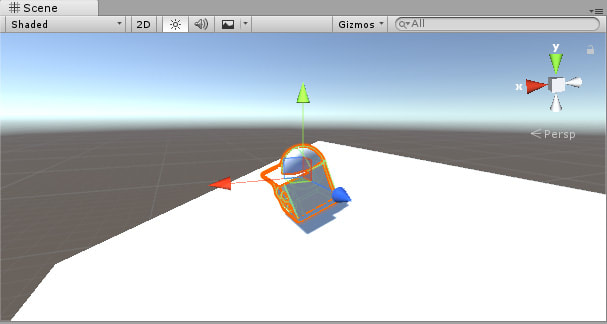
Create a new Unity Project (called “Level 9”)
In your Distribution Folder (in your student account), there is an asset package you need to download with the files, scenes, etc. that you need for today. Go to the Assets Menu > Import Package > Custom Package; then choose the Unity file you see in your Distribution folder
Open the only scene file that comes with this project file; you should then see a number of basics shapes in the scene.
This tutorial will walk you through some basic examples of the topics we talked about yesterday with physics (rigid bodies, colliders, and triggers. Follow the directions on the video tutorial you see below. Some of the scripting you will do will be stuff you haven’t seen before (more so with the triggers). Just follow the directions and you should be able to create the items you see in the video just fine.
4/10/18 - Physics Materials - Settings for various types:
Commands to create a new Physics Material (Create Menu in Project Window > Physics Material)
Create each of the following (in a new folder called "Physics Materials)
Attached each one (one at a time) to a cube in your scene (that's laying flat). Rotate your plane so that when running your game, you'll see how each physics materials is affected (see above picture)
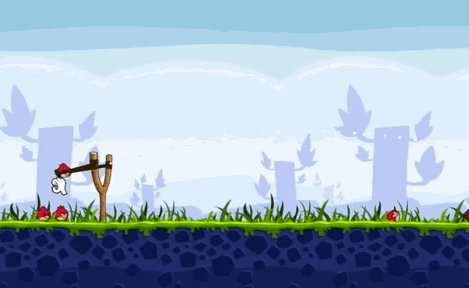
Assignment: In your "MyIsland" project, add a physics material to one GameObject of your choice. When the game is played, this GameObject will interact with your game somewhere near the start of your FPS Controller. DUE: Monday, 4/9
Source: Angry Birds
4/11/19 - Coin Pickups (Video Tutorial by BeepBoopIndie). Directions: Open your Level 9 Project and create a new scene (called CoinPickups). Follow the directions in the video on how to add coins to a scene (which I know you've done before), use colliders and destroy in collecting the coins, using GUI Labels to create a score in the upper corner of the game (we haven't talked about GUI Labels yet; just follow along in the video), and transform in rotating the coins)
Assignment: In your "MyIsland" project, add a gameObject that you want the player to collect during your game. Add a material to it of your choice (color or texture). Have the GameObject rotate (you choose the settings). Add coding where the object will be destroyed once collected. Lastly, similar to the video tutorial, have a running score in the upper corner of the game showing how many objects have been collect. DUE: _________________
4/15/18 - Pick Up and Move Objects (Video Tutorial by Matt Westler). Directions: Open your Level 9 Project and create a new scene (called PickUpObject). Add (2) 3D Objects (plane and cube) to the scene. Add materials to both objects (you choose). Follow the directions in the video on how to create a script that will allow you to pick up an object with your mouse as well as release that object.
Assignment: In your "MyIsland" project, place a number of GameObjects around one of your collectable items from the last assignment (i.e. if you had a coin, you could have cubes that look like wooden boxes around this coin to make it hard for the player to get). Come up with script (similar to the tutorial) that will allow the player to pick up these items and move them in order to retrieve this collectable item. Before calling Parslow over, make sure you test the game and try moving these objects from various angles to make sure it doesn't just work from one direction. DUE: Thursday, 4/12
4/10/18 - Shooting Projectiles and Picking Up Items (to Reload Projectiles (Video Tutorials by Stuart Spence). Directions: Open your Level 9 Project and create a new scene (called ShootProjectiles). Add a plane 3D object. In the first video below, follow the directions in the video on how to create a script that will allow you to shoot spheres. In the second video, you will learn how to have a limit on how many projectiles you have and how you can pick up an item that would allow you to reload on these projectiles.
Assignment: In your "MyIsland" project, use another GameObject (instead of a sphere) in shooting a projectile in your game. Then create a script that will use another GameObject that the player can collect in order to reload (as well as limit how many projectiles you start of with). This object does not need to be a cylinder as you saw in the tutorial. I will test the game by shooting your projectiles, collecting your GameObject to reload, and shoot at something in your game that will knock it over (i.e. a stack of boxes). DUE: Wednesday, 4/18
?????? - Pick Up Keys and Unlock Gates (Video Tutorial by Stuart Spence). Directions: Open your Level 9 Project and create a new scene (called UnlockGate). Add (4) 3D Objects (plane and three cubes) to the scene. Two of the cubes will act as "walls" with the third cube acting as a door (click on the picture above). Add materials to your objects (you choose). Follow the directions in the video on how to create a script that will not allow you to go through the door unless a certain a key you pick up is picked up and brought to the door.
Assignment: In your "MyIsland" project, place a door or gate somewhere in your scene. Place one of your collectable items from above on the other side of this door/gate. Place a GameObject of your choice (i.e. key, weapon) that must be collected and taken to this door/gate in order to "unlock it". Make sure you test it before calling Parslow over. DUE: _______________